Sandbox Exercise - Customize Columns on a Quick Report
This exercise will walk you through changing the columns on a Quick Report, as well as changing the order of the columns.
This exercise is for training purposes, and is intended for use in your sandbox environment.
-
Select Quick Reports from the Reports menu.
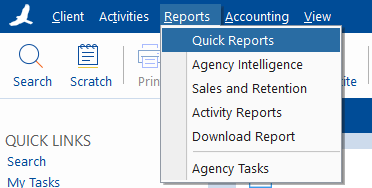
HawkSoft Business Intelligence opens to Quick Reports in your preferred web browser.
When prompted for HawkSoft Web credentials, your username will be Initials@Agency ID, where the initials are the same ones you use to log into the HawkSoft application. Your password will be the same password you use to log into the HawkSoft application.
Your Agency ID is displayed in the top left corner of the HawkSoft application window for easy reference. -
Click the + New Report button.
-
Select Client > All Clients, then click Run Report.
-
Click on
 Columns Options in the upper right of the report detail window.
.
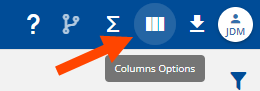
The Column Options dialog opens.
-
Click Add Column in the lower left to add a new column to the report.
A blank entry is added to the bottom of the list of columns.
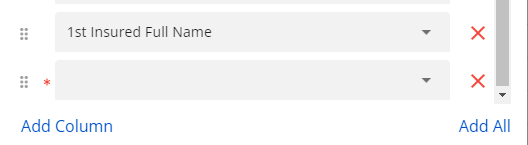
-
Click in the empty field.
-
Begin typing a field name, then select it from the pop-up list.
-
-
Optional: Click and hold the 6 dots
 next to any column to drag it up or down the list. Columns will be ordered left to right on the report corresponding to the top to bottom order of this list.
 -
Optional: Click the red
 to the right of a column field to remove that column from the report.
 -
When you are finished, click the Save button.
The report refreshes to display any changes you made to the columns shown.
Congratulations! You've successfully customized quick report columns and completed the Customize Columns on a Quick Report exercise.
For more information about Quick Reports, and what they can do for your agency, see Quick Reports.
 Related Topics