Each client has a tab for Custom Fields to provide an opportunity for you to enter client information that is not included in any of the standard fields found in the Edit Client/Policy dialog. You can create these custom fields from the Client Custom Fields tab in Agency Setup.
Once the Client Custom Fields are set up, they are available on each client and you can report on the data entered in these fields. To report on this data, you can add a column to any report and then summarize/filter/sort by that client information.
See Client Custom Fields for more information on how to access these fields when inserting a client.
This task is typically performed by an Owner/Administrator or Manager.
 Required Permissions
In order to complete this task, user permissions must be set to include:
Agency Setup > Client Custom Fields
See User Permissions for more information.
Example:
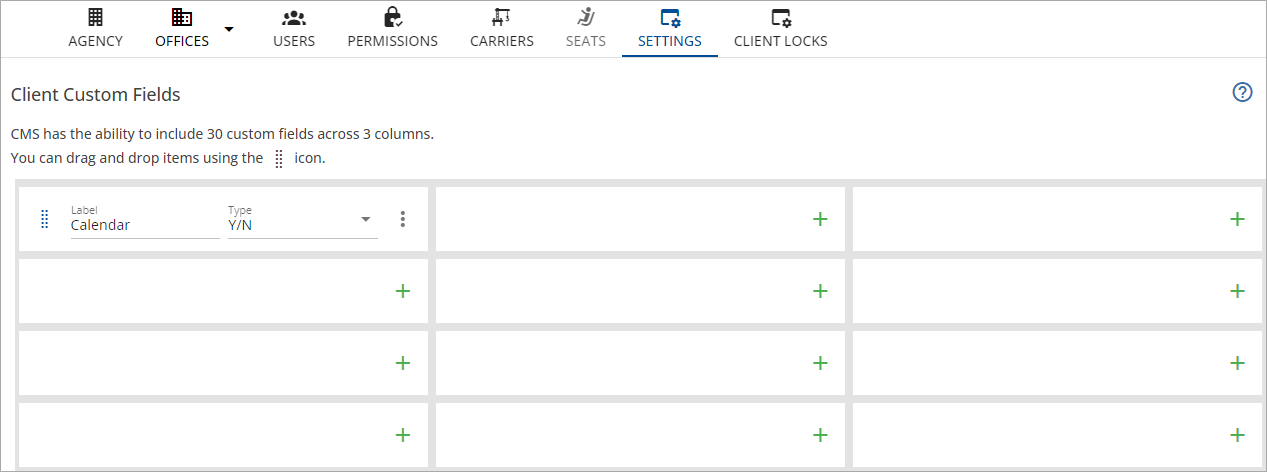
ABC Insurance Agency sends a yearly calendar to clients that fit the agency's "send calendar" requirements (whatever these may be). The agency needs a reportable field to determine how many calendars to order. ABC Insurance creates a custom client field labeled Calendar, and selects the Y/N format. Now ABC Insurance can run a report at the end of the year based on the Yes or No answers.
To add Client Custom Fields
-
Click
 Setup, and then select Agency Setup > Settings, and then select the Client Custom Fields tab.
The Client Custom Fields dialog opens and displays 30 customizable fields that can be included in the client.
-
Click the green plus to create a new Client Custom Field.
-
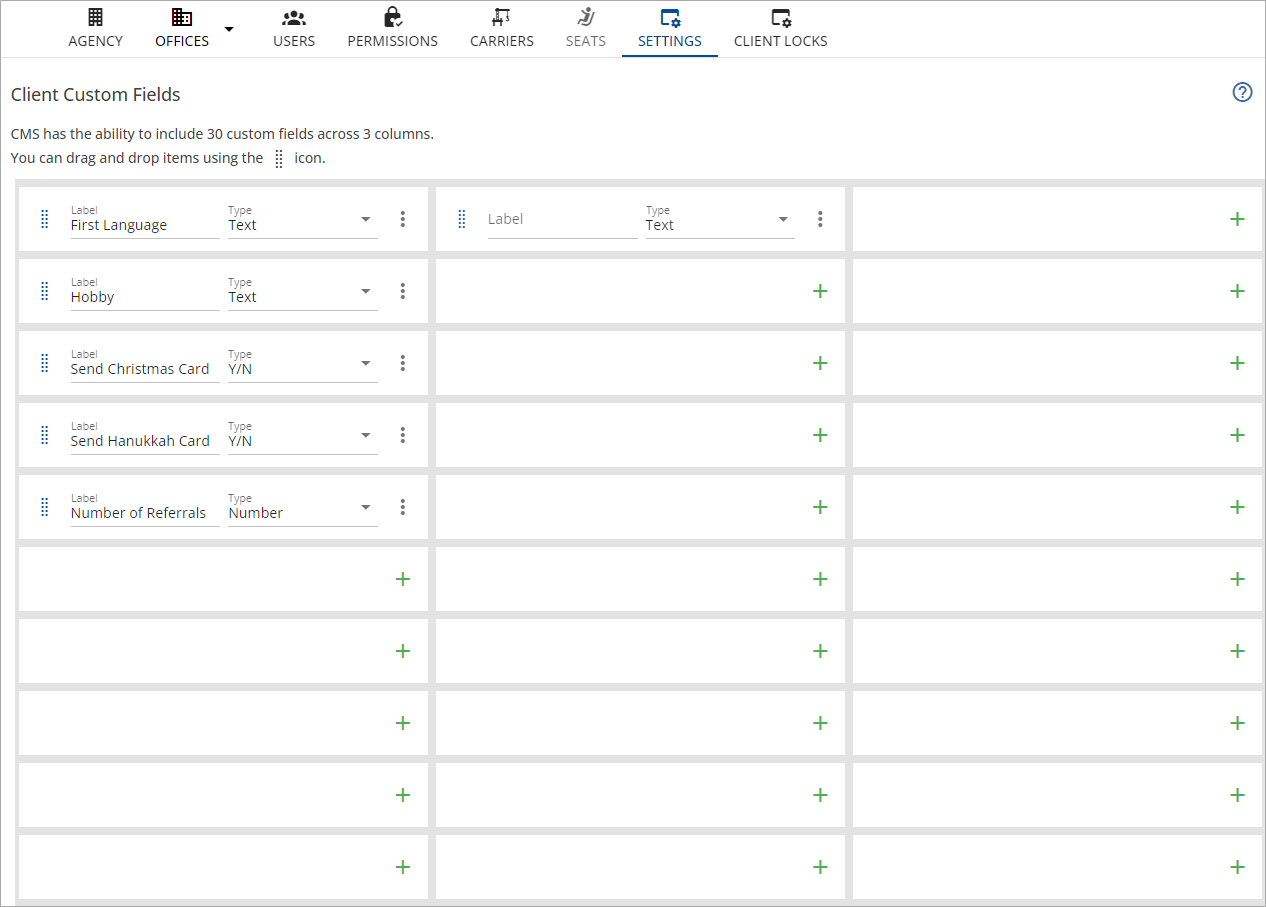
Enter a title for the custom client field into the Label field.
Example: Preferred Language, Calendar, Mailing List, etc.
-
Select a format for the custom client field from the Type drop-down list for each data type.
Data Format User can enter or select: Header Header text specifies columns in custom client fields Text Free form text Currency Dollar amount entries up to 9,999,999.99 Date XX/XX/XXXX Number Numeric entry Phone (###) ###-#### x#### Gender Female, Male, or Non-Binary Y/N Yes or No - Click the
 Save icon.
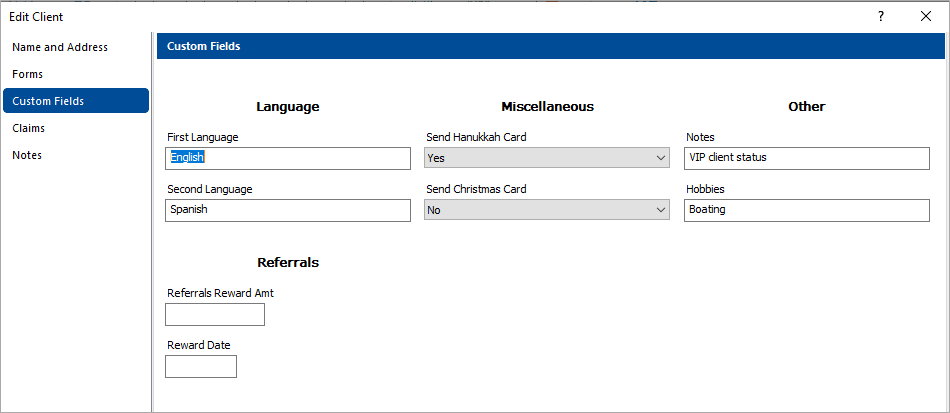
The fields appear on the Custom Fields side-tab in the Edit Client/Policy in the order they are entered on this setup screen.
To rearrange Client Custom Fields
Click the  Column icon, and then drag and drop the custom client field into the new column or row position you prefer.
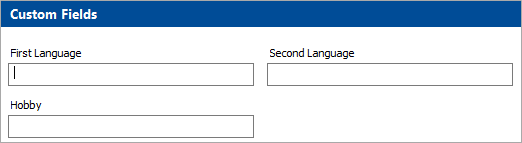
Example: If you want a field labeled First Language to appear to the left of another field labeled Secondary Language, create the First Language field in the left-hand column and the Secondary Language field in the right-hand column.
To archive a Client Custom Field
-
Click the
 Dots icon of the Client Custom Field you wish to archive.
 -
Click Archive.
-
Click the
Save icon.The Client Custom Field is now archived.
To restore a Client Custom Field
-
Click the
 View Archived button.
The Archived Fields dialog opens at the top of the Client Custom Fields screen.
To hide the archived Client Custom Fields, click the Hide Archived button.
-
Drag the archived Client Custom Field you wish to restore and drop it into the column and row you would like the field to display in.
-
Click the
Save icon.The Client Custom Field is now restored and displays in the Client Custom Fields tab in HawkSoft.
To delete a Client Custom Field
-
Click the
Dots icon of the Client Custom Field you wish to delete. -
Click Delete.
The To Be Deleted dialog opens, stating that the fields and all data assigned to them will be deleted upon save.
-
Click the
Save icon to save your changes to Client Custom Fields.A warning dialog appears stating that the client data will be lost and all data assigned to the field you selected to delete will be lost. The dialog asks if you are certain you would like to delete this field.
-
Click Yes.
The Client Custom Field is deleted.
Related Topics