The HawkSoft Virtual Printer
The HawkSoft Virtual Printer is a tool that enables you to turn any document, website, or image (or anything else on your computer that can be printed) into a PDF document to attach to a client/policy, rather than sending the document to your physical printer.
The most common use of this feature is to save items from a carrier website or from your computer to the client's attachments tab.
The HawkSoft Virtual Printer is installed when the HawkSoft program is installed to your computer. To uninstall your virtual printer, see My Workstation Settings and External Tools.
See Drag and Drop Documents for instructions on attaching files and documents from your computer directly to a client/policy.
 Required Permissions
To perform this task, no specific HawkSoft user permissions are required.
Using the HawkSoft Virtual Printer
-
Ensure that you are logged into HawkSoft before using the Virtual Printer.
You can optionally open the client and policy that you want to attach this document to in HawkSoft before using the Virtual Printer.
This will enable you to quickly select that client/policy in the Virtual Printer, rather than having to manually search for the client and policy in the Virtual Printer dialog.You may also optionally choose to change the Virtual Printer/Unmatched Documents PDF Viewer before using the Virtual Printer. See To change default Virtual Printer PDF viewer for more information.
-
Access the Print option in the program that contains your document/image/website/etc.
-
Select HawkSoft Virtual Printer, and then click Print.
HawkSoft creates a PDF image and displays the image in the HawkSoft Virtual Printer viewer.
HawkSoft Virtual Printer Toolbar icons
Use the Toolbar icons to rotate documents, view a specific page in a document, etc.
Toolbar Icon Function Description 
Toggle File List In the Virtual Printer, clicking this button will take you back to the beginning of the client/policy selection dialog, at the bottom of the Printer.

Select Page When the document contains more than one page, use the arrows to move to the previous or next pages, as needed.
You can also select a specific page from the available drop-down.

Rotate Right/Left Rotate document 90° right or left. Typically used for scanned items.
These buttons only temporarily rotate the document. Once the document is attached to the client, the rotation will return to its original state. (However, the document can be temporarily rotated again when viewed in the Attachments List.)

Best Fit Resize to show entire page.

Fit to Width Resize so the width of the page matches the width of the window.

Fit to Height Resize so the height of the page matches the height of the window.

Zoom Out/In Use the Zoom icons to zoom in or out on the document.
You can also select a zoom percentage from the available drop-down.
-
Optional: Append any additional documents to this print job, as needed.
To append a document to the current print job
Documents printed to the Virtual Printer can be combined prior to being attached to a client file. For example, you might need to print two items separately, but want to attach them as one document.
- Print a document using the HawkSoft Virtual Printer.
-
Print an additional document to the virtual printer.
When you click Print for the second document, the HawkSoft Pending Print Job dialog opens with the following options:
- Append to Current Print Job – The second document is added to the first, as part of the same PDF file.
- Create a New Print Job – Creates a separate PDF file and opens a new instance of the HawkSoft Virtual Printer.
-
Choose whether to attach this PDF document to a client or policy, or to send this document to the Unmatched Documents Inbox for processing.
To attach the PDF to a client/policy
-
Select a client/policy to attach the document to in the lower section of the Virtual Printer viewing pane.
-
If you have any clients/policies open in HawkSoft, they will be listed in the "Select Client" table.
Select an open client/policy, and then click Next.
-
Confirm the policy that you wish to attach the document to.
By default, the policy tab that is open on the client file is selected. If needed, you can select a different policy to attach the document to, or select Client to attach it directly to the client file.
-
Click Next.
OR
-
-
Search for a client and policy from the database.
- Click Search to access the client search fields.
-
Enter search criteria in one of the available fields, and then click Search.
A list of client files matching the search criteria is displayed.
If the client needs to be added, click Create Client.
-
Select the matching client file, and then click Next.
The list of policies associated with the client file is displayed.
The last item in the list is Client. You can use this option to attach the PDF directly to the client file, instead of a specific policy.
- Select the policy or the Client tab, and then click Next.
If the policy needs to be added, click Create Policy.
-
-
Complete the Attachment Properties information, as needed.
The information in these fields will appear on the Attachments view screen in the client file.
Agency administrators can customize Attachment Categories and Description templates. See Customize Attachment Categories and Descriptions for instructions and permissions required to modify these drop-down lists.
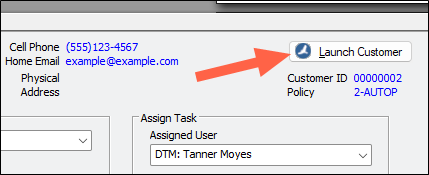
You can click Launch Customer to open the client and policy in HawkSoft, enabling you to confirm you have the right client/policy selected, or check any client/policy details, before attaching this document.
-
Enter a Description (name) for this document, or select a Description template from the drop-down list.
-
Optional: Modify the Effective Date, if needed.
The default effective date is the date the document was printed.
-
Optional: Select an Attachment Category from the drop-down list.
- Optional: Record the Premium associated with the document being attached.
-
-
Optional: Type in or select a user from the Assigned User drop-down to create a quick Task for that user, related to this document.
The Assigned User drop-down should only be used to create a quick, non-time sensitive task. Tasks created directly from the Virtual Printer window will use the Description of the document as the name of the task, and will not have a task description, category, priority, or due date. However, these can be modified after the task is created.
See Tracking My Daily Tasks for more information. -
Click Attach.
A dialog appears confirming that the document has been attached to the client.
If you checked Open Client on Attach, the client and policy the document was attached to automatically opens in HawkSoft.
If you have the action menu open or if you are creating a log note on a client, then this document will attach to the resulting log note automatically.
To send the PDF document to Unmatched Documents for later processing
-
Close the HawkSoft Virtual Printer by clicking the red X in the top-right corner.
The Virtual Printer Pending Job dialog opens.
-
Select Send to Unmatched Documents and Close.
The Virtual Printer closes, and the document is sent to the Unmatched Documents Inbox, where it can be processed later.
To learn how to process a PDF document in the Unmatched Documents Inbox, see Processing Unmatched Documents.
-
To change default Virtual Printer PDF viewer
When viewing PDF documents in the HawkSoft Virtual Printer, you can choose between using Adobe Acrobat or HawkSoft Viewer as your PDF viewer.
- Click the
 Settings icon, and then select My Workstation Settings.
 -
Select the preferred PDF viewer from the Unmatched Documents PDF Viewer drop-down.
As the name of the setting implies, the Unmatched Documents PDF Viewer setting also determines which viewer is used to view PDF documents in the Unmatched Documents Inbox, in addition to the HawkSoft Virtual Printer.
Related Topics