Sending Documents for HawkSoft E-Signature
HawkSoft integrates with Formstack Sign, so you can send documents straight from HawkSoft for electronic signature. Customers can then sign and return them electronically using the HawkSoft E-Signature application.
After the document is signed, the signed document is then re-uploaded to HawkSoft.
You can run an Activity Report for the User <E> to see which clients' documents have received E-Signatures during a specific date range.
This topic provides steps on how to send documents via email, text message, or you let people sign in person.
See E-Signature Overview for more information about electronic signature options in HawkSoft, purchasing information, and configuration instructions.
For more information about using the Formstack Sign product, see the Formstack help documentation.
Depending on your agency settings, signed documents may automatically be attached to the customer in HawkSoft.
Sending Documents for E-Signature
You can send documents for E-Signature via email or text message, or you can obtain E-Signatures in person. You can also mix-and-match, sending the same document using email, text message, and in-person signing to different signers. Once you have uploaded documents to Formstack Sign, you can specify how you want those documents delivered to each signer.
You can use In-Person signing when the customer is in your office or when you go out into the field to meet the customer, so the customer does not need to use their own device.
-
Open the client or policy you are emailing the document for.
-
Access the document you are sending for signature.
You can send existing attachment(s), an ACORD form you are filling out, or a change request form as part of updating a client or policy.
Your combined attached documents must have a combined size under 18 MB.
 To send an attachment
-
Open the Attachments tab.
-
Select the document(s) you wish to send for E-Signature.
You can send multiple documents by Shift or Ctrl clicking documents.
-
Right-click on the document(s) and select Send for E-Signature.
The Send for E-Signature dialog opens.
See The Attachments List for more information about working with attachments.
To send an ACORD form
- Click Action, and then select one item in each of the first three lists to describe what prompted this transaction.
-
Select ACORD Forms.
-
Once your form is complete, click Print or Send in the top left corner of the form.
The Print or Send Document dialog opens.
This dialog enables you to email, print, and attach the form, as well as send the form for signature.
-
Select Send for E-Signature.
The Send for E-Signature dialog opens.
See Creating and Modifying an ACORD Form for more information about ACORD forms.
To send a Change Request form
-
After editing a policy, in the Edit Client/Policy dialog, click Finish.
The Change Form dialog opens.
-
Optional: Type in the Comments box and then click Refresh Preview to add additional comments to the change form.
-
Click E-Signature.
The Send for E-Signature dialog opens.
After sending the document for signature, finish creating your log note.
See Change Policy Information and Change Client Information for more information on making changes and creating a Change Request form.
-
-
Follow the prompts in HawkSoft to upload the document to Formstack Sign
To upload the document to Formstack Sign
-
In the Send for E-Signature dialog, add a Role and Email for each participant.
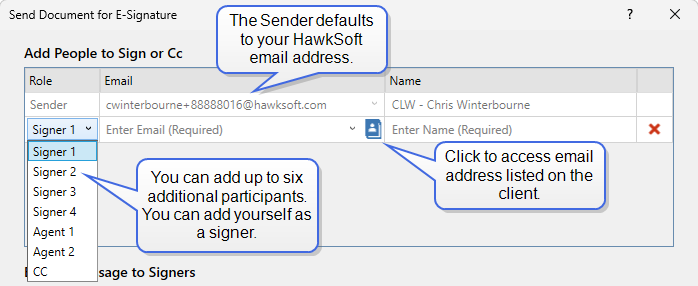
Email addresses are required as part of the upload process, even when you intend to send documents via text message or sign in-person.
-
Enter a message to send to all signers.
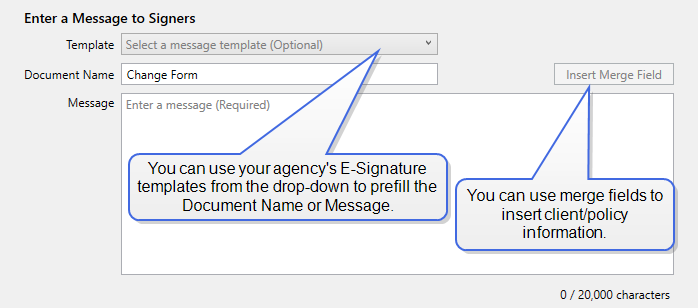
Your agency can create E-Signature Templates containing a subject, message, and additional attachments. Templates can auto-fill client and policy information.
-
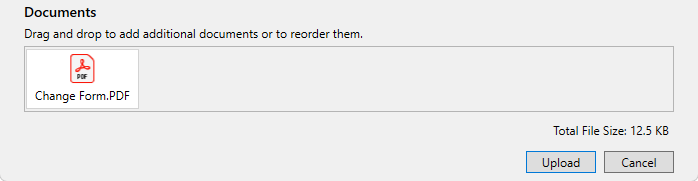
Verify that all of the documents you are sending for signature show in the Documents pane.
You can drag-and-drop any additional documents or drag-and-drop existing documents to rearrange them, as needed.
-
-
Sign in to Formstack and follow the prompts to send the document for E-Signature.
To process the document in Formstack
Your progress is saved automatically while you are in Formstack. If your work is interrupted you can re-open Formstack to resume work at any time.
-
Sign in to Formstack.
Formstack Sign uses Two-Factor Authentication (2FA) to send a One-time password (OTP) to your registered authentication device. You can set your 2FA device in Formstack Sign by clicking on your name in the top-right, then clicking Account Settings > Your Profile.
-
For each participant, verify their Email, add a phone number to Send via SMS Text Message, or designate the participant as an In Person Signer.
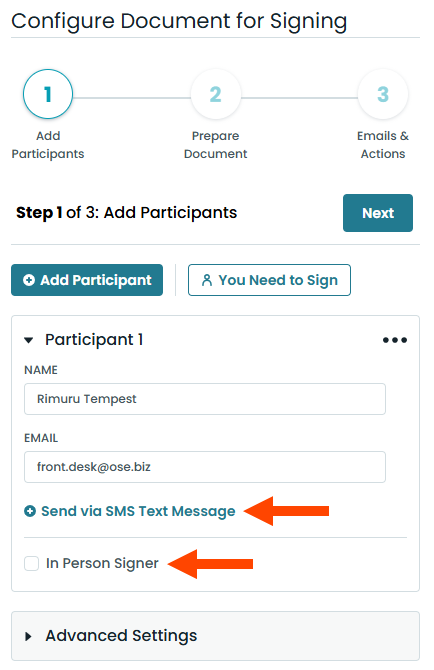
To enable in-person signing, click on your name on the top-right of Formstack Sign, select Account Preferences, and then check the Enable In-Person Signing box.
-
When you are finished reviewing the participants, click Next.
-
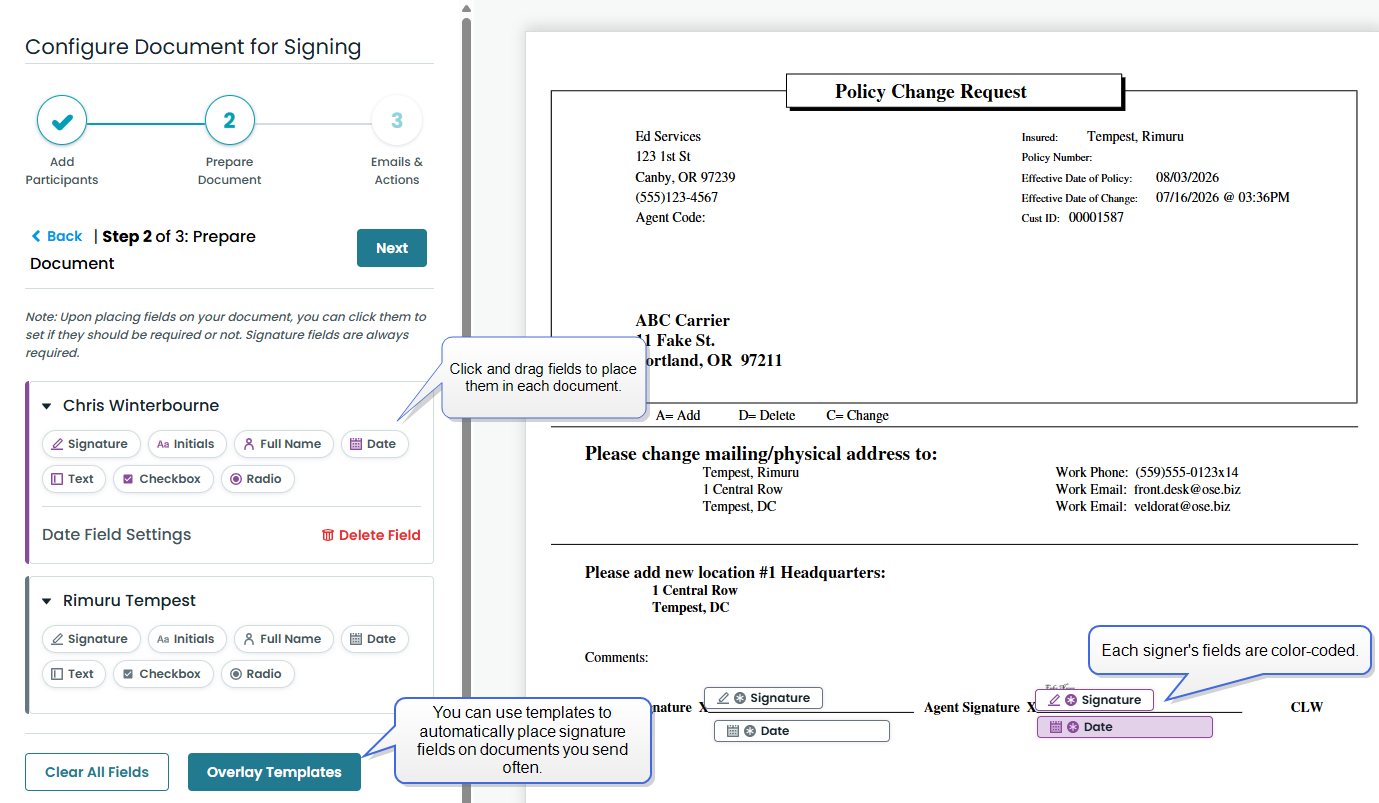
Drag-and-drop signature and other fields for each signer onto the appropriate location on each document, and then click Next.
You can also add Full Name, Initials, Date, and text fields, as well as check boxes. Each field is assigned to a specific signer.
You can use Overlay Templates to create and apply Signature templates for common forms.
-
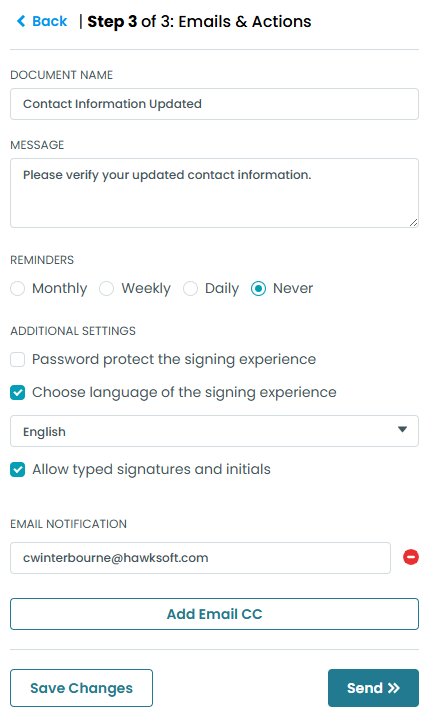
Verify the message you are sending to participants.
You can set automatic reminders, which are only sent to participants who have not finished signing.
Optionally, you can require participants to use a password.
-
When you are finished, click Send.
You can save your work and send the document later.
Once the document has been signed, HawkSoft will create a log note or task on the client, depending on your agency settings.
-
 To create a signature field template
You can create a signature field template for when you send the same document often.
-
Upload a copy of the document you want to create a template for.
You can send a blank document, then cancel sending it after you have created the template.
-
When adding a signature, click Overlay Templates.
The My templates dialog opens.
-
Add a Template Name and check the Keep template private box.
-
Send Document for E-Signature: Select a Category from the drop-down or Create a New Category for your template.
-
Add Log Entry Comments
For more information see the Formstack help article, Field Templates.
To access a saved document
You can save your work in Formstack Sign to create a draft you can return to later. This is useful when something suddenly comes up, or when you are assigning multiple signers to long documents.
You can apply templates to a specific page.
-
When you are ready to send your saved package, log in to Formstack.
-
Click Documents.
-
Find your E-Signature package, and then click ••• in the Actions column, and then select Resume.
Sharing a HawkSoft E-Signature Account
If multiple people are using a shared login and the 2-Factor Authentication (2FA) is set up on one person's phone (via authenticator app), others using the account may have difficulty accessing the code to log in. This is a common issue for applications that require 2FA.
For shared accounts, consider using the manual entry key option (next to the QR code during setup) to set up a shared online 2FA code generator in programs such as 1Password, Bitwarden, or LastPass. The manual entry key can be stored in a shared vault entry; anyone with access can generate a valid code from any computer.
For more information, see the Formstack help article, Two Factor Authentication.
Related Topics