The HawkSoft Document Creator
The HawkSoft Document Creator allows you to upload and combine PDF documents from your local workstation, search for text, highlight, delete, or redact specific text passages, and then save your changes as a new document.
The Highlight, Redact, and Whiteout tools can only be applied to selectable text. HawkSoft relies on existing text and does not create text in the PDF file. Depending on how a PDF was produced, some or all of the text may not be selectable. This is most commonly caused by the text inside of a PDF being saved as an image, instead of saved as text.
 Required Permissions
To perform this task, no specific HawkSoft user permissions are required.
How do I get here?
Open the Activities menu, and then select Document Creator.
To use Document Creator, your Unmatched Documents PDF Viewer must be set to HawkSoft Viewer.
Using the HawkSoft Document Creator
To use Document Creator, your Unmatched Documents PDF Viewer must be set to HawkSoft Viewer.
-
Open the Activities menu, and then select Document Creator.
The HawkSoft Document Creator opens.
-
Drag-and-drop the first PDF document you want to edit from your computer's File Explorer into the background of the Document Creator window.
OR
Open the File menu, and select Open.
-
Navigate to and select the document you want to edit.
-
Click Open.
-
-
Optional: Add additional PDF documents as needed.
-
Navigate to each document you want to add using File Explorer on your local workstation.
-
Drag-and-Drop each PDF document to the thumbnails list (visible on the left-hand side panel).
You can drag and drop the file before or after any page in the current document.
You can hide or display Thumbnails in the View menu.
-
-
Edit the document as needed.
You can Search for specific text from the View menu.
HawkSoft Document Creator Toolbar icons
Use the Toolbar icons to rotate documents, view a specific page in a document, etc.
Toolbar Icon Function Description 
Select Page When the document contains more than one page, use the arrows to move to the previous or next pages, as needed.
You can also select a specific page from the available drop-down.

Rotate Right/Left Rotate current page document 90° right or left. Typically used for scanned items.
These buttons only temporarily rotate the document. Once the document is saved, printed, or attached to the client, the rotation will return to its original state. (However, the document can be temporarily rotated again when viewed in the Attachments List.)

Best Fit Resize to show entire page.

Fit to Width Resize so the width of the page matches the width of the window.

Fit to Height Resize so the height of the page matches the height of the window.

Zoom Out/In Use the Zoom icons to zoom in or out on the document.
You can also select a zoom percentage from the available drop-down.

Highlight Add or remove a highlight to the currently selected text.

Whiteout Apply or remove whiteout to delete the currently selected text. 
Redact Redact or reveal the current text. Highlights, whiteout, and redact tools are permanent once the document has been saved, printed, or attached to the client. Text that has been whited out or redacted cannot be recovered.
-
Save, print, and/or attach the document to a client, and then close the HawkSoft Document Creator window.
To attach the PDF to a client/policy
-
Click Next in the lower section of the Document Creator viewing pane.
-
Search for the client.
-
Select a client/policy to attach the document to.
-
If you have any clients/policies open in HawkSoft, they will be listed in the "Select Client" table.
Select an open client/policy, and then click Next.
-
Confirm the policy that you wish to attach the document to.
By default, the policy tab that is open on the client file is selected. If needed, you can select a different policy to attach the document to, or select Client to attach it directly to the client file.
-
Click Next.
OR
-
-
Search for a client and policy from the database.
- Click Search to access the client search fields.
-
Enter search criteria in one of the available fields, and then click Search.
A list of client files matching the search criteria is displayed.
If the client needs to be added, click Create Client.
Before creating a new client, use Client Search to verify that client does not already exist. This will help prevent duplicate clients and keep your database clean. If the client does not appear in your first search results, try using different criteria, such as a different name, business name, mailing address, or phone number.
-
Select the matching client file, and then click Next.
The list of policies associated with the client file is displayed.
The last item in the list is Client. You can use this option to attach the PDF directly to the client file, instead of a specific policy.
- Select the policy or the Client tab, and then click Next.
If the policy needs to be added, click Create Policy.
-
-
Complete the Attachment Properties information, as needed.
The information in these fields will appear on the Attachments view screen in the client file.
Agency administrators can customize Attachment Categories and Description templates. See Customize Attachment Categories and Descriptions for instructions and permissions required to modify these drop-down lists.
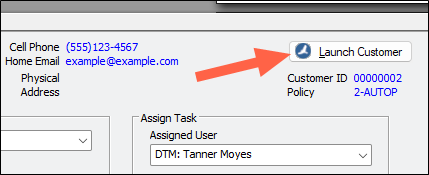
You can click Launch Customer to open the client and policy in HawkSoft, enabling you to confirm you have the right client/policy selected, or check any client/policy details, before attaching this document.
-
Enter a Description (name) for this document, or select a Description template from the drop-down list.
-
Optional: Modify the Effective Date, if needed.
The default effective date is the date the document was printed.
-
Optional: Select an Attachment Category from the drop-down list.
- Optional: Record the Premium associated with the document being attached.
-
-
Optional: Type in or select a user from the Assigned User drop-down to create a quick Task for that user, related to this document.
The Assigned User drop-down should only be used to create a quick, non-time sensitive task. Tasks created directly from the Document Creator window will use the Description of the document as the name of the task, and will not have a task description, category, priority, or due date. However, these can be modified after the task is created.
See Tracking My Daily Tasks for more information. -
Click Attach.
A dialog appears confirming that the document has been attached to the client.
If you checked Open Client on Attach, the client and policy the document was attached to automatically opens in HawkSoft.
If you have the action menu open or if you are creating a log note on a client, then this document will attach to the resulting log note automatically.
To save the document to your HawkSoft Inbox
Open the File menu, and select Save.
Your HawkSoft Inbox is the default folder when processing Unmatched Documents.
To save the document to your local workstation
-
Open the File menu, and select Save As.
-
Select a folder on your workstation to save the document to, and then click Save.
To print the document
Open the File menu, and select Print to open your print dialog.
Related Topics